Table of Contents
Introduction
This was originally a senior design project to create a controllable resistive load for a turbo generator on which I served as an advisor. The project was left just shy of complete, and I redid some of the work including replacing the Arduino with a custom embedded system, replacing inadequate crimps/wires, and other miscellaneous tasks. This project is essentially a baby version of our Cessna project, but for dissipating power extracted from a turbine exhaust-flow rather than that generated by a coupled turboprop.
Electrical System Overview
The electrical system is comprised of a full bridge rectifier, 10 ceramic resistors, 10 relay boards to handle the switching of the resistors, and a control board that interfaces with each relay board. The entirety of the DC system is fused. The control board interfaces with a host computer over serial bus to accept a quantity of resistors for activation. All ten resistors are 6.8 ohms, allowing for a maximum power dissipation of 7kW at the fully-charged voltage of a 24S system. The system could safely operate up to 121 volts due to the 1kW rating of each resistor and accompanying stage.
 Completed resistor bank
Primary Control Circuit
If you feel inclined to inspect them for yourself, you can find my code here, and my PCB files here. Otherwise, here is a brief overview of the control board and its code as well as a few pictures.
The board and its corresponding schematic pages are divided into three sections: the primary microcontroller, isolated voltage sensor, and supporting circuity such as power supplies and connectors. The microcontroller was selected to communicate with an external computer over USB, an isolated voltage IC over SPI, and switch 10 GPIO pins to control the resistor stages.
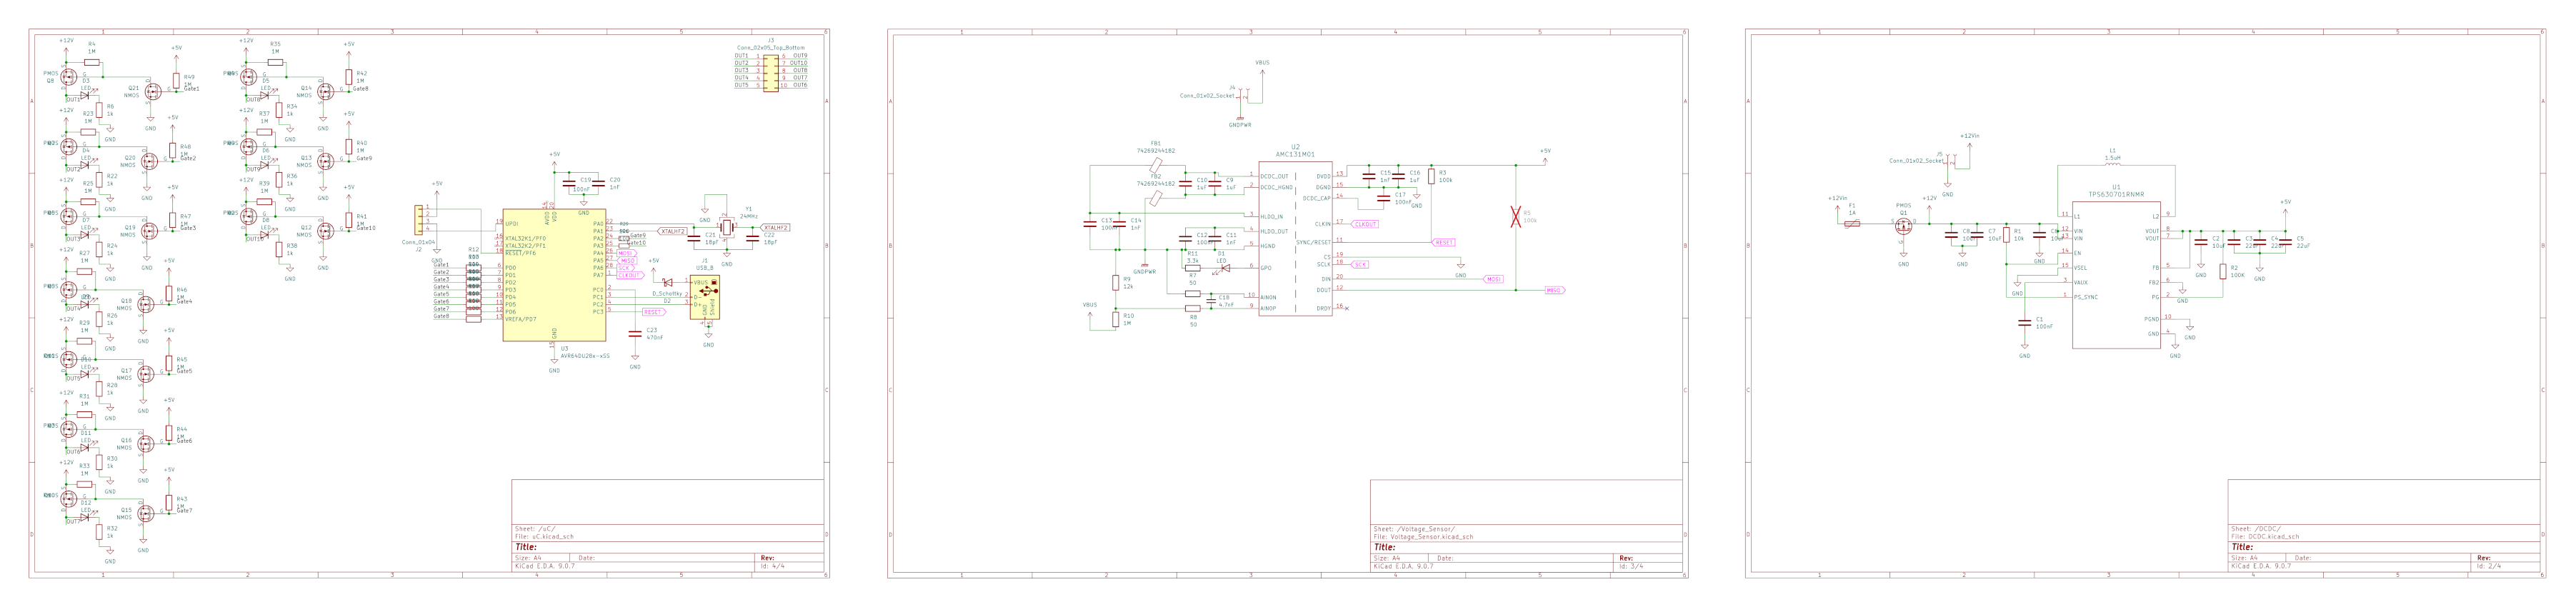 All schematic pages in one image. Open Individually
The top most section of the board contains a 12 to 5 volt DC/DC conver along with the connector which supplies 12 volts to the converter and relay stages, the left section contains the FETs and supporting passives to allow the main controller to actuate each relay board, the right section houses the isolated voltage sensor, its supporting components, and connector to the high voltage bus; the bottom of the board contains the USB-B port which connects the board to a computer and a ten-pin connector which connects the relay stages to the control board. while the bottom contains the I2C connector, 24 volt input, 5 volt buck converter, and the controller programming connector.
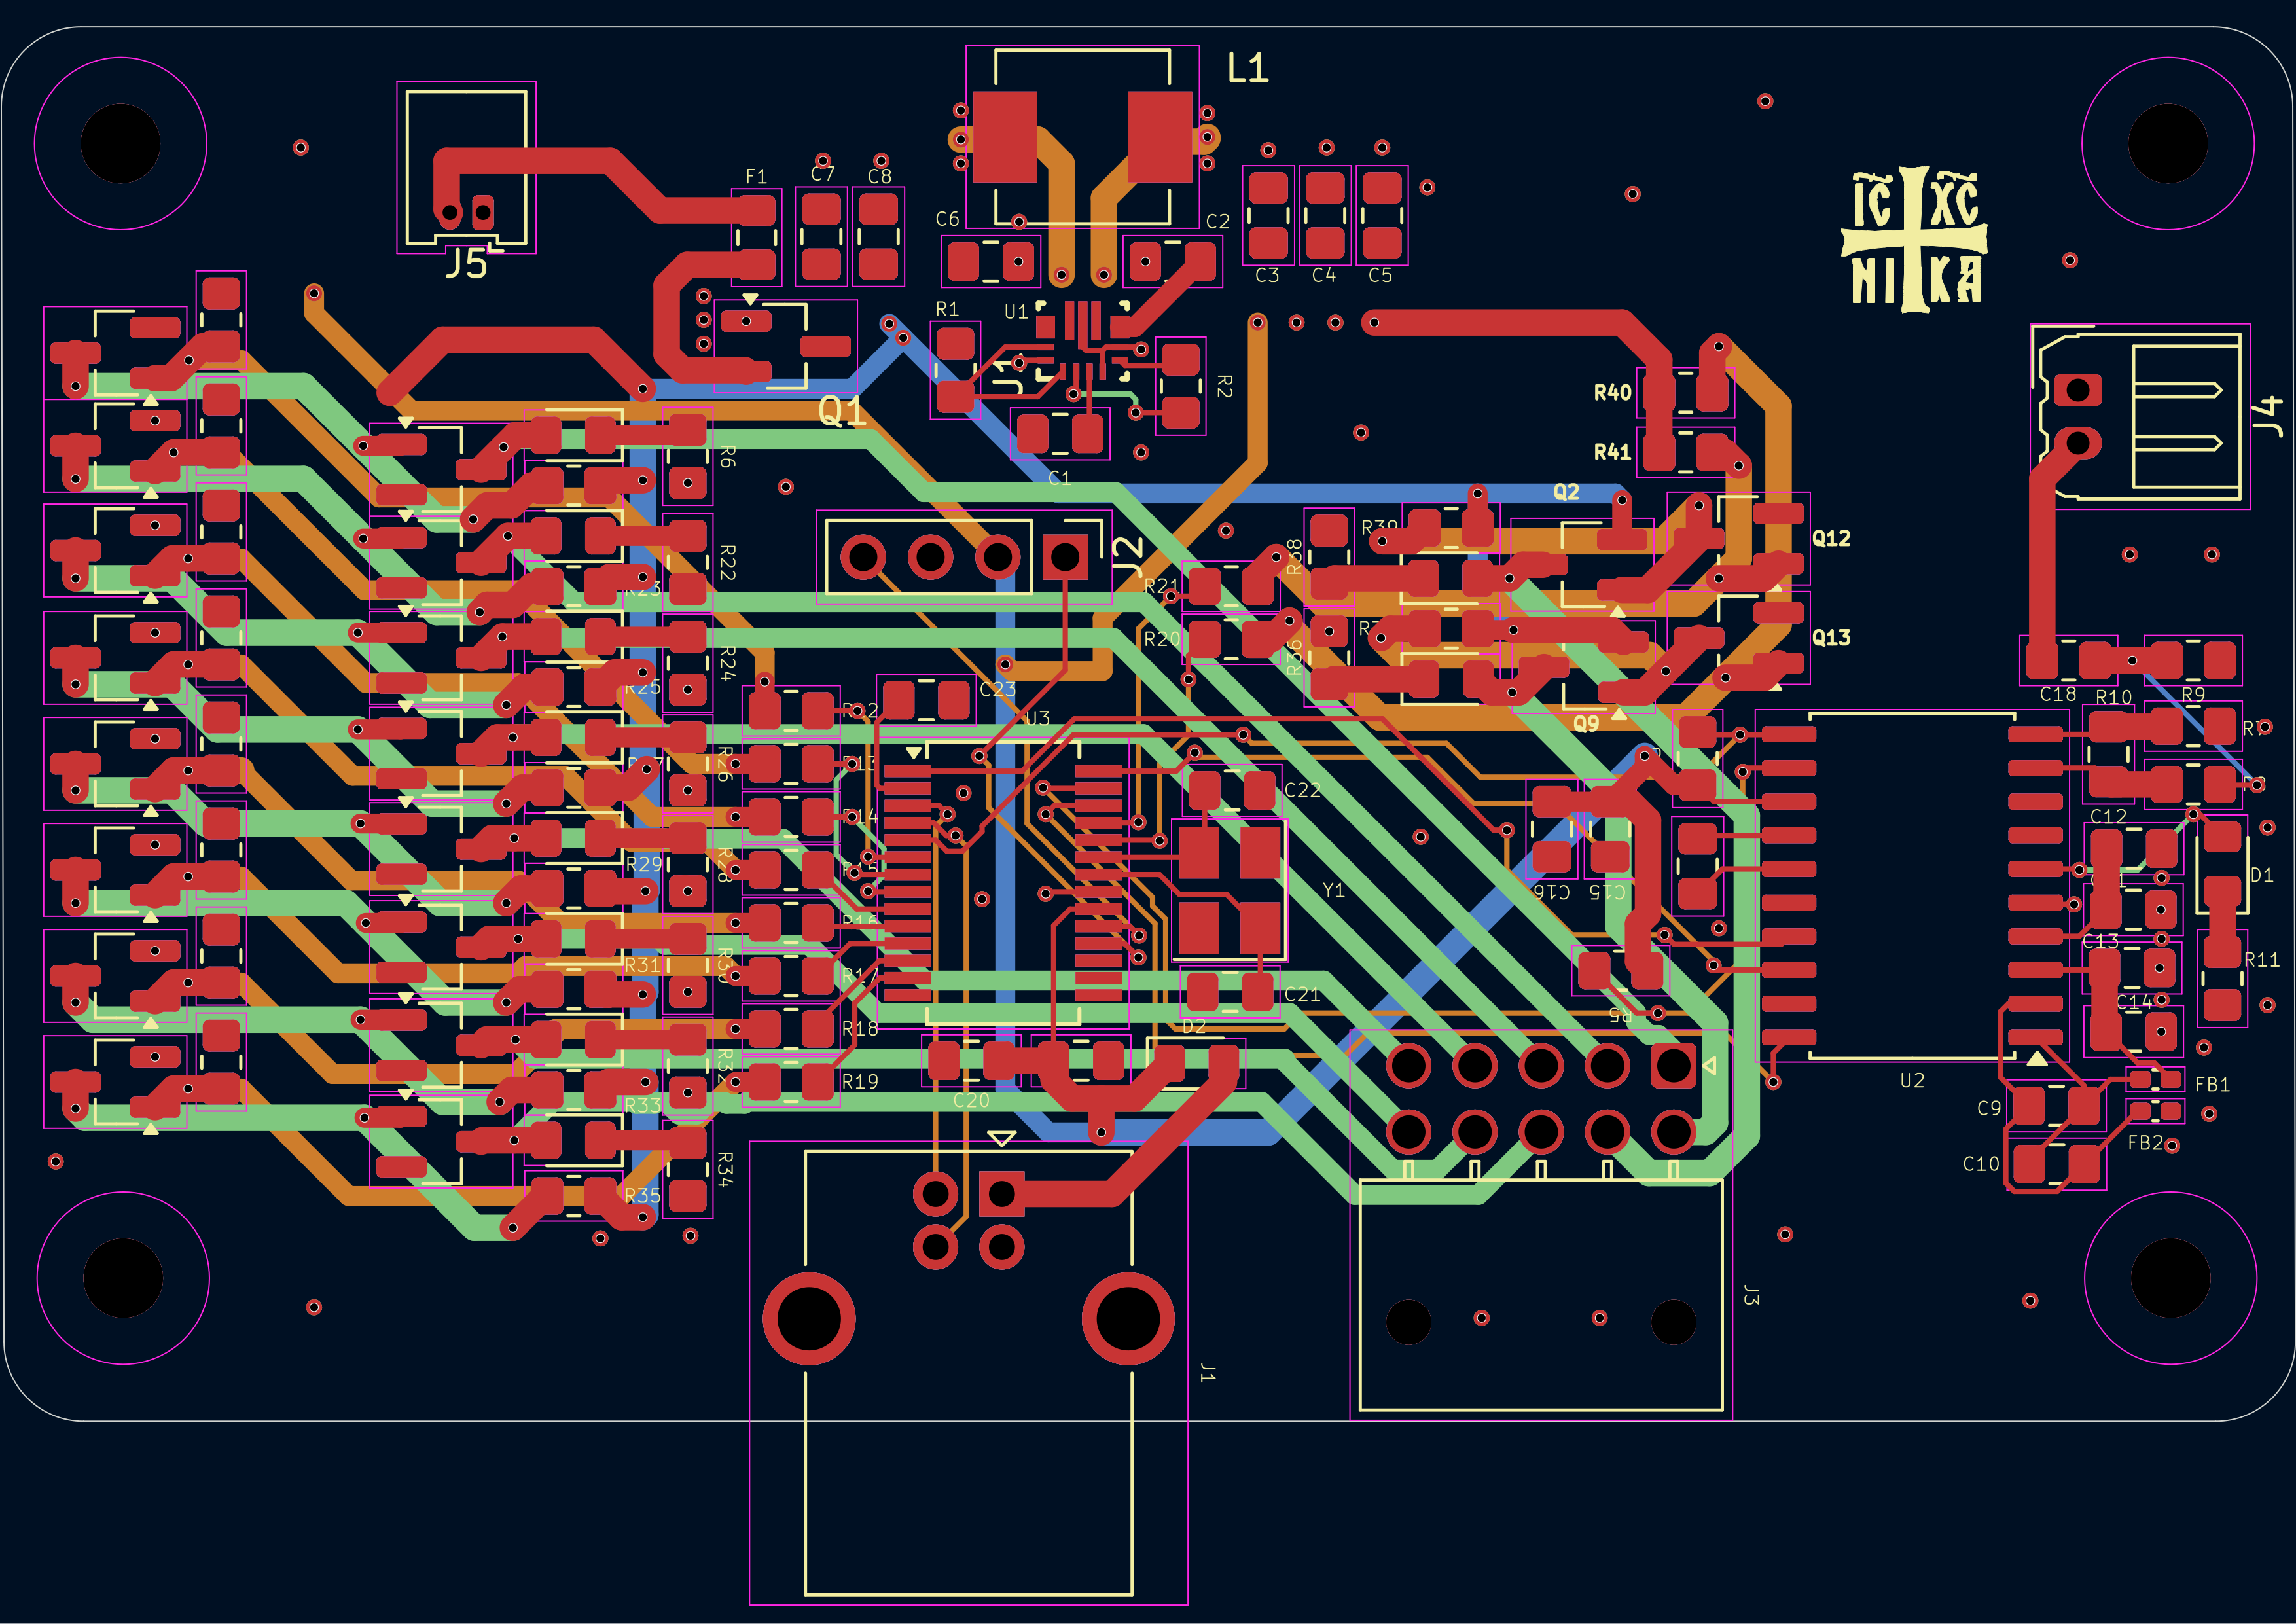 Board file with pours omitted
Usage
Interfacing with the system is simple: connect the USB type B cable to a computer and open a serial interface. The fastest baud rate that I tested was 115200, though you may be able to get away with something faster. Pressing a number key will enable that quantity of resistors, with the exception of the “0” key. “0” will enable all ten stages. “-” and “_” subtract a resistor from the quantity of those currently active, while “=” and “+” add. Any other input will disable all resistor stages.
The board will return a rough estimate of the main-bus voltage, the quantity of active resistors, and the raw output from the isolated voltage measurement circuit. This raw output is the hexadecimal representation of a 24-bit measurement and should be logged then processed in post for more precise data.
Make sure that the logic-side voltage (12V) is supplied by an adequate source in addition to the isolated DC/DC converter. Use, for example, a combination of a DC power supply and a 12V LiPo battery, or a 12V lead-acid battery.